
Milwaukee Skyline Photo Guide - Locations and Tips
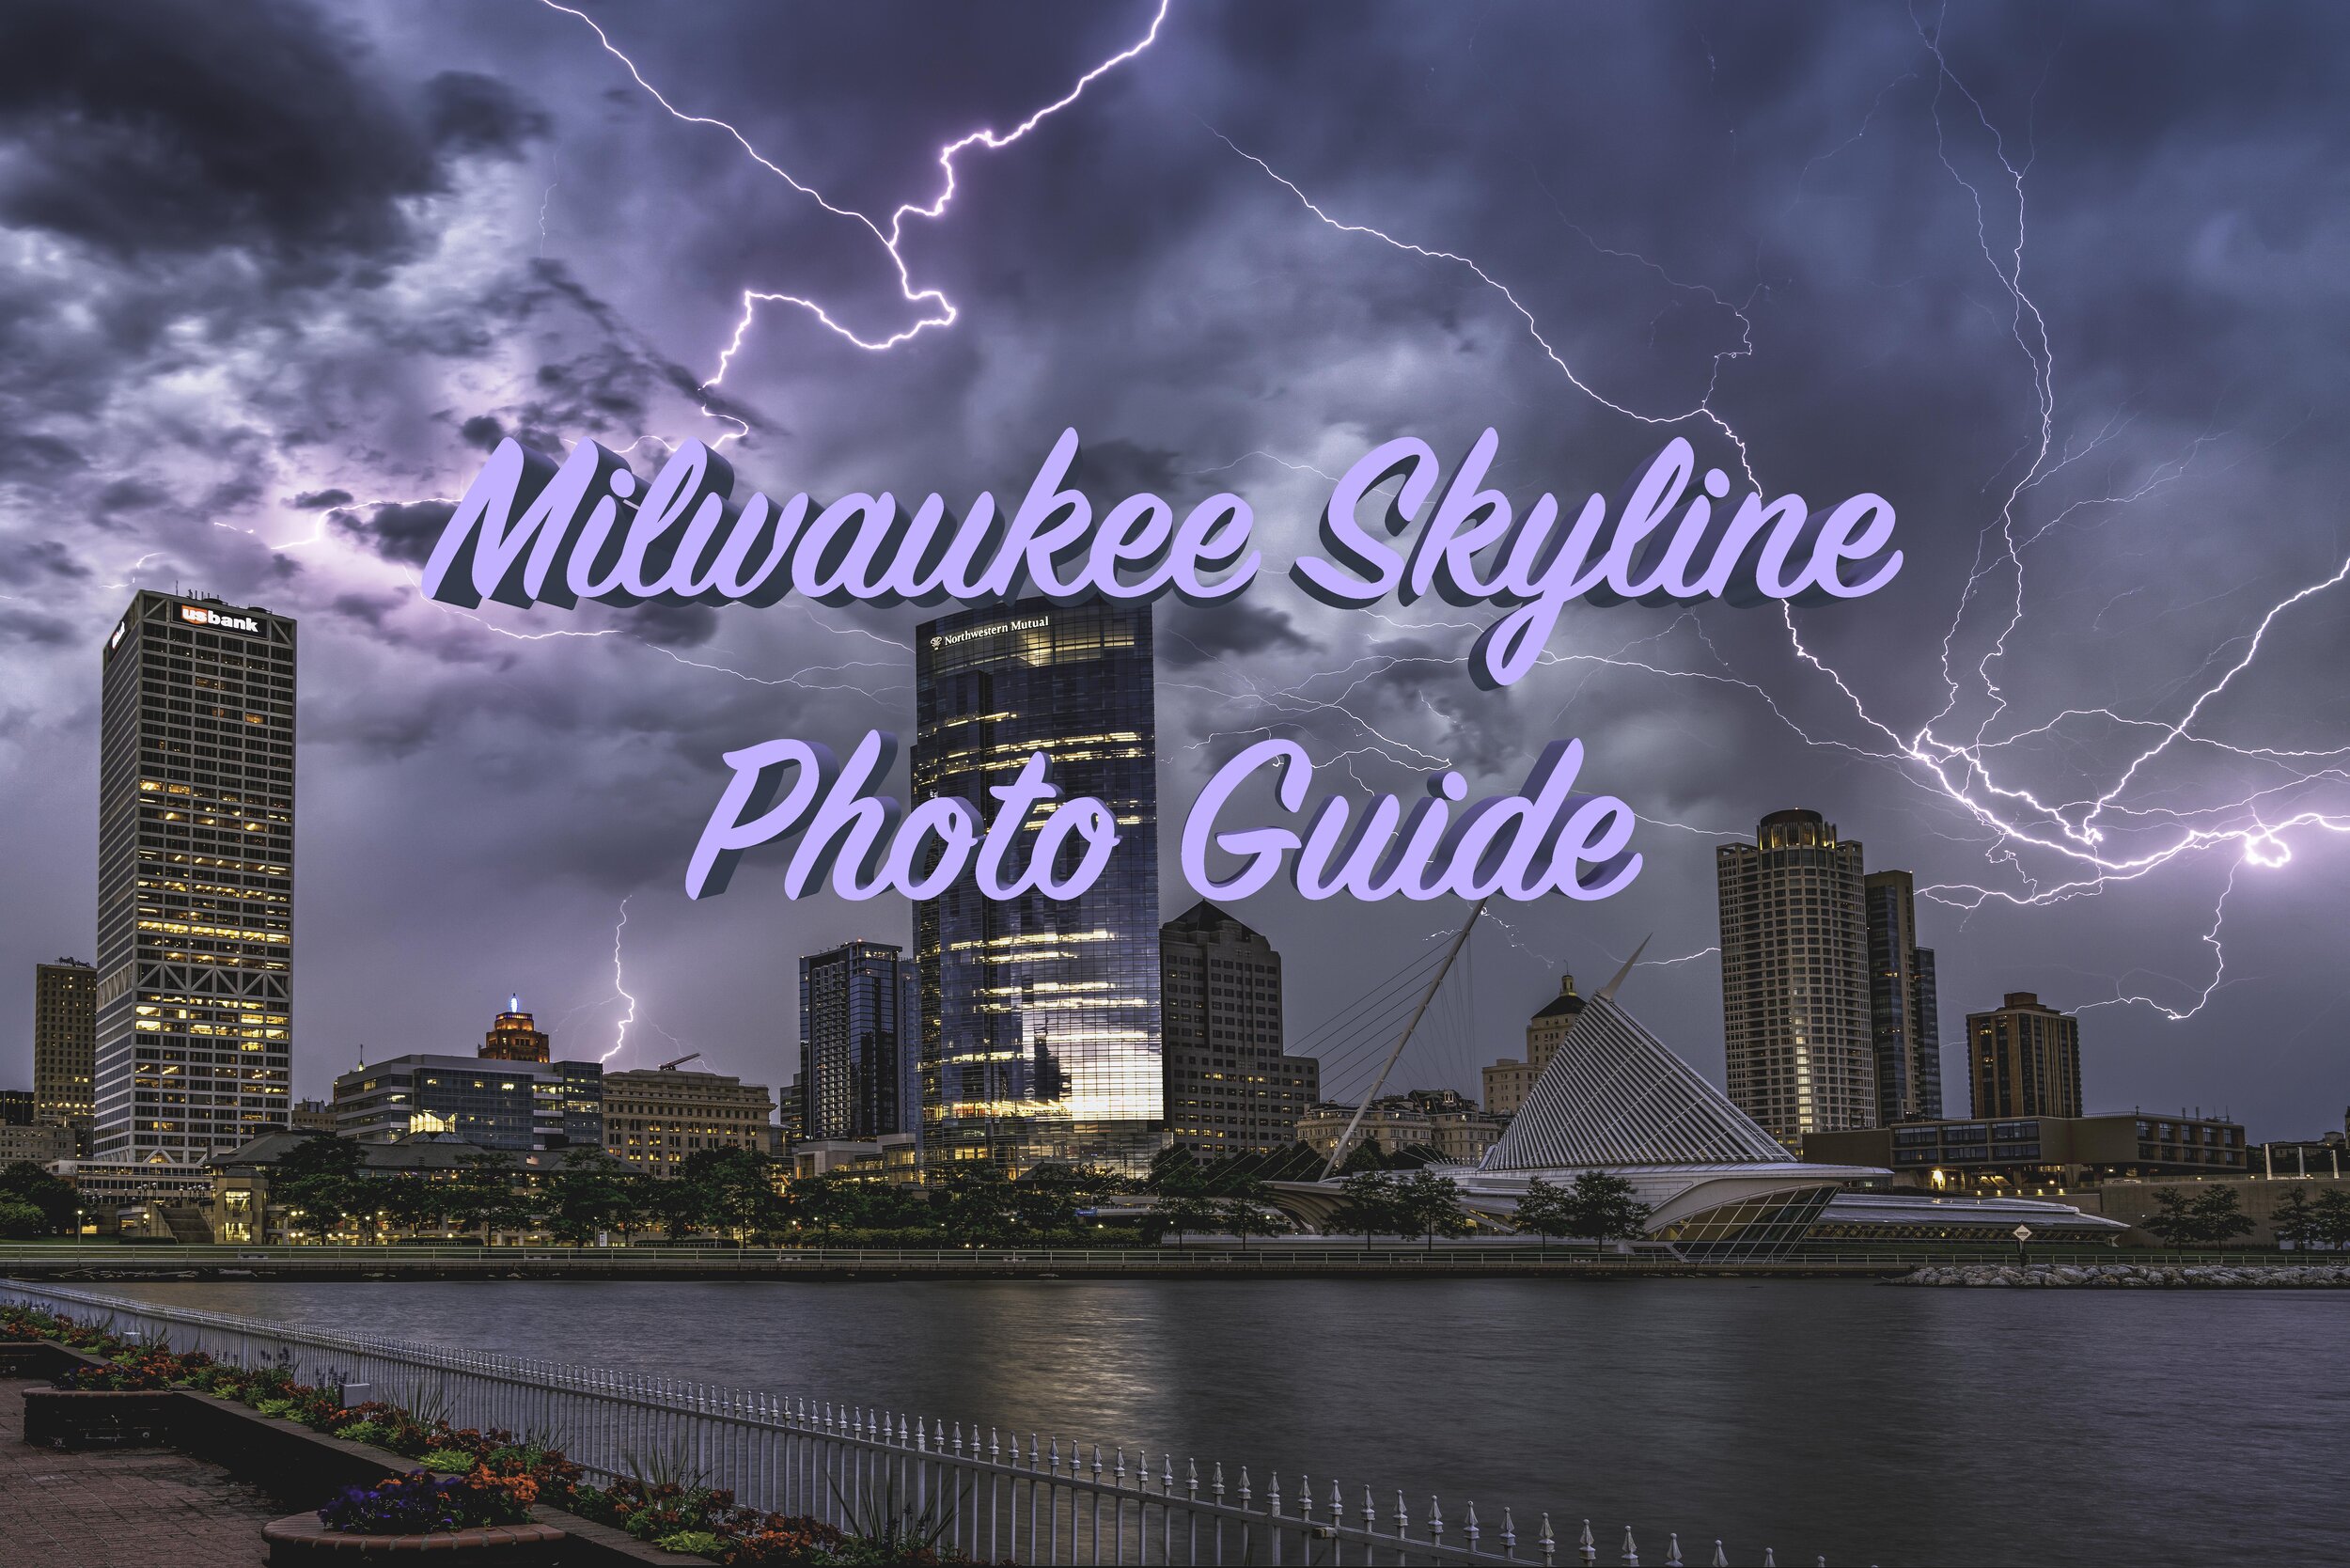
The one year I lived in downtown Milwaukee on the lower east side, I used to love going for runs at night. As I would run at the lakefront, I was always mesmerized looking up at the Milwaukee Skyline. Milwaukee obviously doesn’t have the biggest or most buildings, but they are all unique enough to produce a great photograph. Or maybe my heart is just tied to it because I grew up here. Who knows? Regardless, I’d like to share with you my favorite spots to shoot the Milwaukee Skyline and also I few tips and tricks that I use when photographing cities.
Locations
There are many, many spots to photograph the Skyline of Milwaukee. These are just a few of my favorite. I’d encourage you to spend some time walking around the lakefront looking for your own favorite spot! Also as a side note, these are just for the Milwaukee skyline. There are TONS of other great things to photography at the lakefront.

#1: The Lagoon
This one I found by accident. I was driving home after photographing in Veterans Park and noticed how the skyline reflected in the water. If you are looking for a good water reflection spot, this is a good place to start. I prefer to shoot this location at sunrise as water is usually the most calm in the morning.

#2: Veterans Park Field
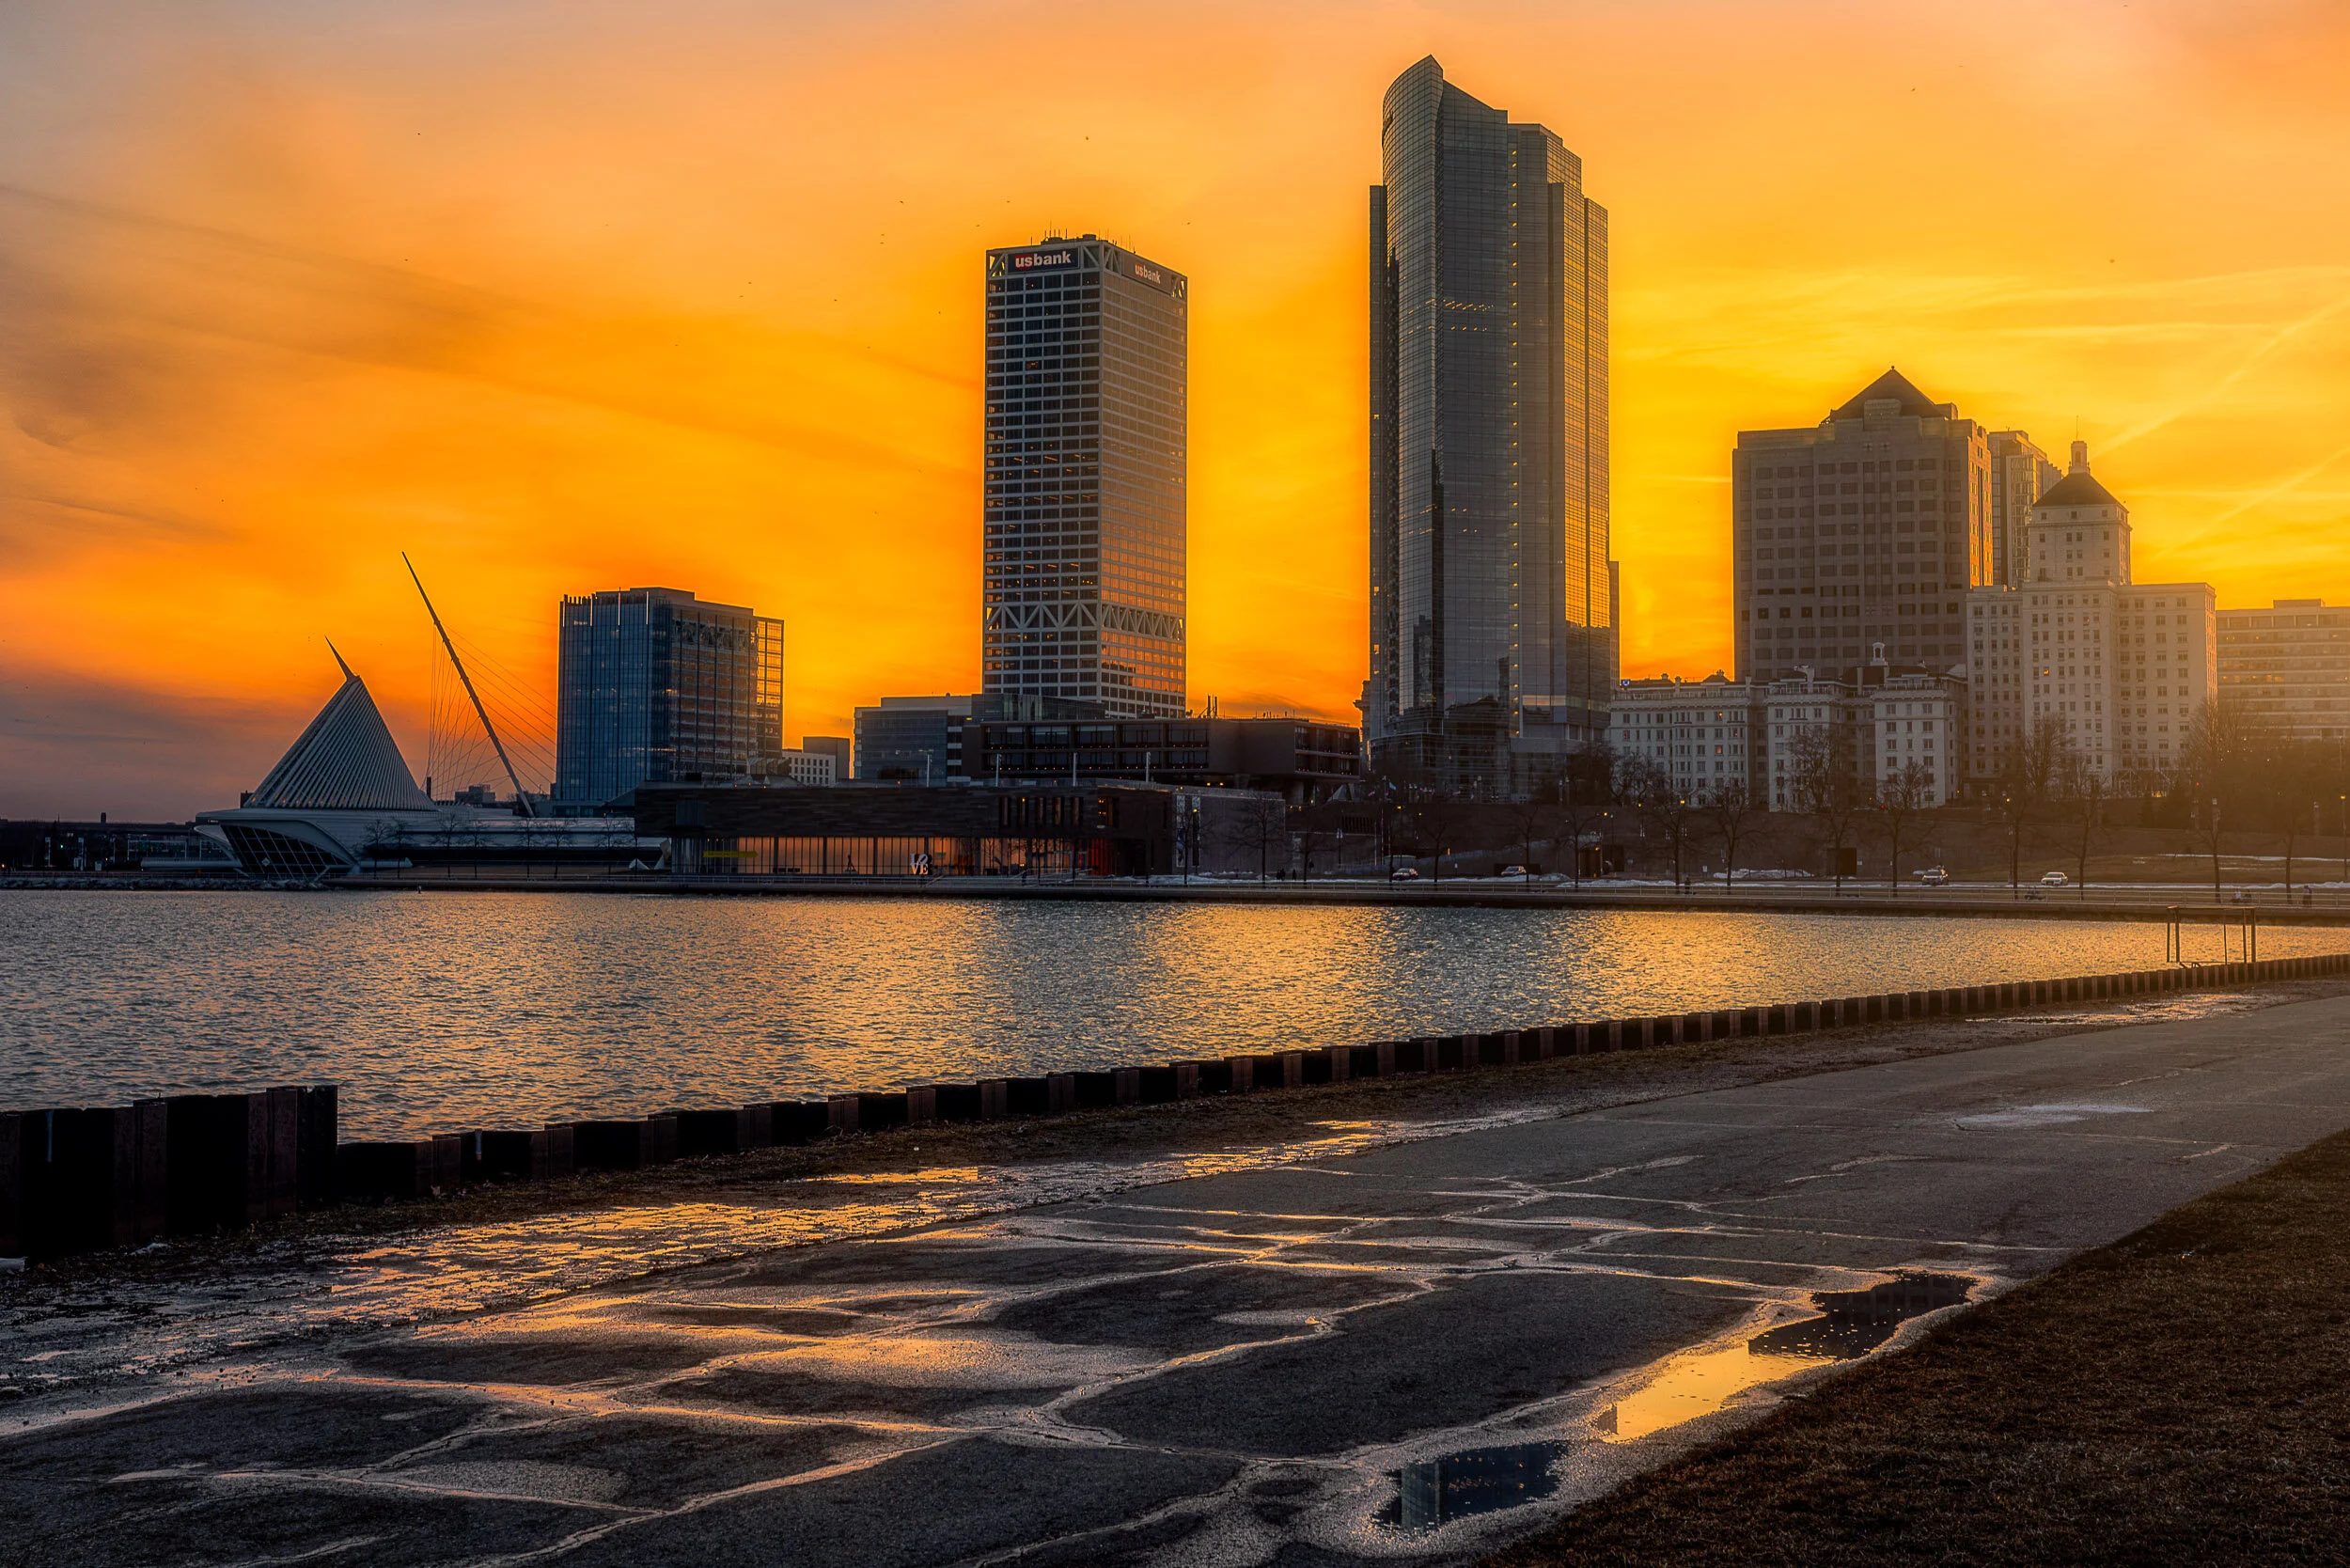
I have not shoot too often from this location but it is a great spot to walk around and try to find an unique element to your photograph. I stopped here one night as I was walking to another spot as I saw the sun reflecting in the Northwestern Mutual building. Sometimes you get lucky in photography! This is a good spot for sunrise and sunset.
#3: Veterans Park Water Walkway
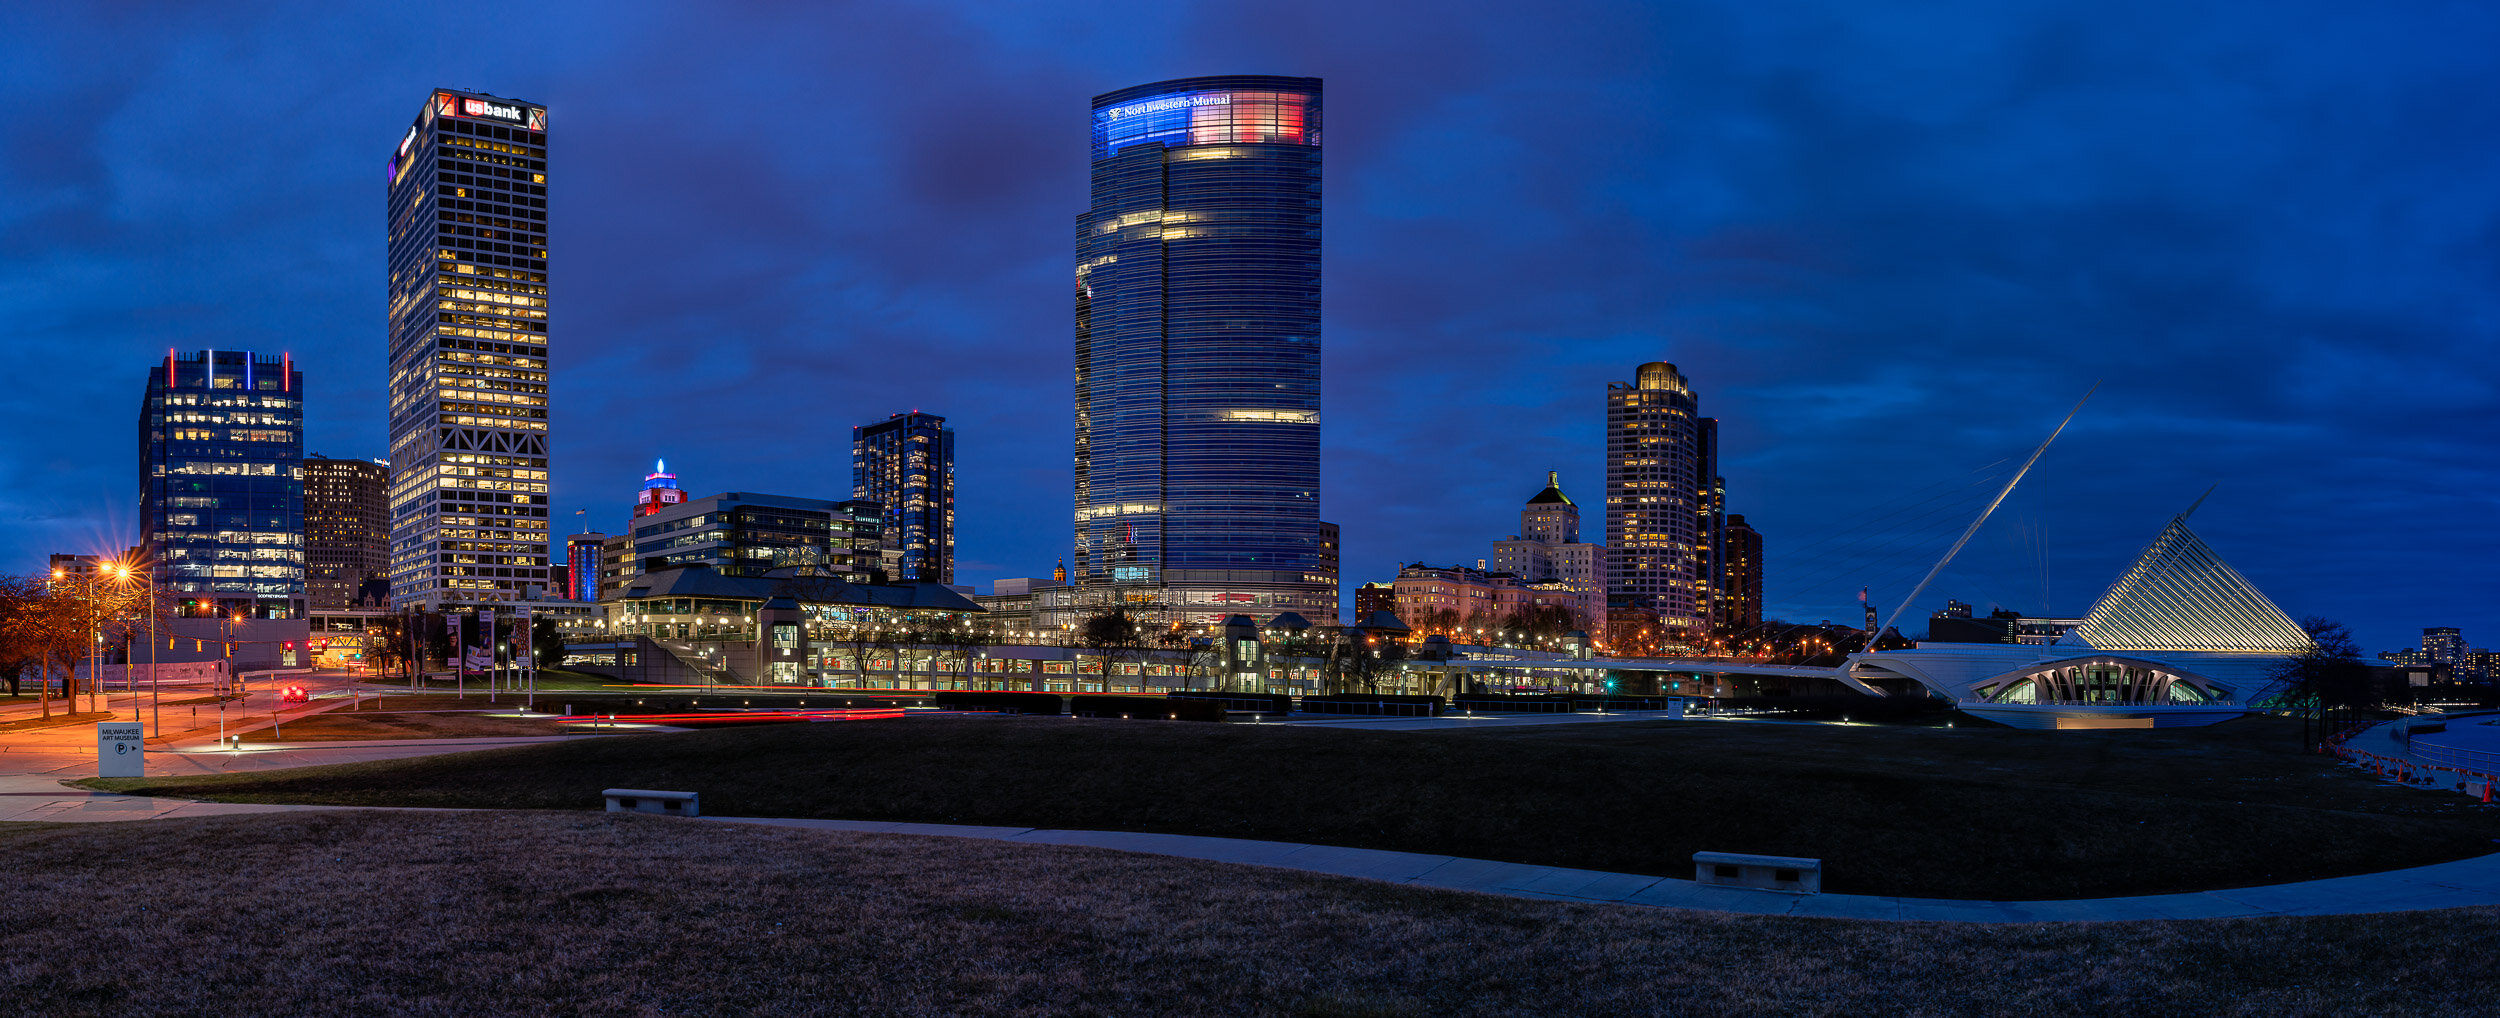
This is one of my favorite spots. You can get a great night shot here with the city reflecting in the water, even though it is a little more choppy usually. This is a good panoramic spot to pan over and get Discovery world and the Hoan Bridge. I mostly shoot here during sunset.

#4: Harbor House
If you Google Milwaukee Skyline photos, this spot will most certainly pop up. The walkway is public even though it goes through the Harbor House property.

#5: Discovery World Pier
This is my absolute favorite spot to shoot the skyline. There are 5-6 spots as you walk along this pier to get a good photo. You can also get a good reflection in the water here. I highly recommend you continue out on the rocks to get another unique composition.
#6: The Hill
There is a small spot here that is really good for a close up panoramic of the city. It is very difficult to shoot in this location with only taking one photo because of lens distortion, I’d recommend getting a panoramic.

#7: Lakeshore State Park
There are a few spots around this location to get a good skyline photo. I particularly like shooting by the bridge. Its lights up at night and gives a great compositional feeling that the bridge is leading you into the city.
Tips and Tricks for Photographing the Skyline
Here are a few tips and tricks when photographing a skyline. These aren’t necessarily true for everything but they are a good starting point and have helped me take better photos. I’ll do a more in depth guide at some point in the future on shooting cityscapes, but here are a few quick things to get you out the door…
Use a tripod. This may go without saying, but by using a tripod you will get sharp photos with long exposures. Without a tripod, your camera will have to crank up the ISO (what the camera uses to brighten the photo artificially) which at higher amounts causes more grain/noise. More grain and noise is not what you want for a clear, crisp and sharp photo.
Shoot during the week and during sunset. Why? The buildings will have more lights on than during the weekend. Workers are in the building more during the week than the weekend so more lights will be on to illuminate the buildings when it gets dark out.
Slightly underexpose your photo when shooting the skyline at night. If you want to have clean, crisp looking lights and signs, slightly underexpose your photo to give the skyline a clean look. It is easier to get more detail out of the shadows of an image than out of the highlights. Many, many images I see of any skyline photo has the highlights overexposed. On a different note, sometimes you may want to overexpose the lights in a photo to get a certain look. Try out both ways and see which one you like better!
Go out in bad weather. This is one of my biggest pieces of advice for anyone doing photography. I cannot tell you how many awesome shots I have gotten in bad weather. A beautiful skyline with dynamic weather makes for an epic photo.
Shoot after it rains for clearer air. The air after a rain is more clear and there is less smog or haze in the air. This will also give you a sharper and clearer image.
Shoot panoramic to avoid lens distortion. The first reason I like to shoot panoramic is that when you combine 2-5 photos together, you get a higher resolution photo. You can then print a larger picture, and it'll be way sharper. The second reason is lens distortion. When taking a photo of tall buildings up close, they can look a little distorted (see photo below.) I can correct that a little bit in photoshop, but by zooming in closer, taking 4-5 pictures of the scene, and then combining them, you get less distortion.
